Wednesday, December 23, 2009

Mac and Cheese: The first interfamilial stove verse microwave cook off

Two amateur chefs will enter the kitchen; only one will leave victorious; both will leave with kick-ass mac and cheese.

The Competitors:
-Chris "The Microwave Magician" - Tom "The Stove Sorcerer"

The Game:
Mac and Cheese

The Ingredients: Whatever necessary, that's right "playing by the jungle rules"


Tom "The Stove Sorcerer"
: Knowing that my sister would go with microwave noodles and sauce, I knew that the quality of my noodles would be what set my mac and cheese apart. I also knew that having a constant flame under my sauce would allow me to combine more spices and cheeses for a more interesting taste. First, I heated milk and heavy whipping cream in a small pot over medium heat...stirring it...ever so gently... round and round the whisk would go...creating a vortex of delectability. I added two type of cheese: New York Extra Sharp Cheddar and Wisconsin Classic Cheddar.

I added a few, I don't even know how many, teaspoons of cornstarch.
I find the best way to cook noodles is to: 1) Bring 4-6 quarts of water to a rolling boil. Add salt to taste, if desired. 2) Add contents of package to boiling water. Stir gently. 3)Return to a boil. For authentic "al dente" pasta, boil uncovered, sitrring occasionally for 8 minuted. For more tender pasta, boil an additional 1 minute. 4) Remove from heat. Drain well. 5) Serve immediately with your favorite Barilla sauce. (Chris' note: if that step seems a little out of place, it is because all of these steps were stolen straigh from Barilla's pasta box.)

I then put pasta in the bowl, poured sauce on top, grated some more Wisconsin Cheddar on top. Then I added my secret ingredients: mustard powder and paprika. For those of you recreating this recipe, add the mustard and paprika when you add the cheese to sauce. Enjoy.


Chris "The Microwave
Magician": Tom loves spices, so I decided to keep my mac and cheese simple. First, put the raw pasta (about a pint's worth) in a microwavable bowl. For the cream sauce, microwave about a cup of milk until it is near boiling (2 to three minutes), then add three teaspoons of cornstarch and stir until it is dissolved. Add a grated mix of Wisconsin and New York Sharp Cheddars and Dubliner's cheese and stir the mixture until the cheeses were mostly melted. Then, microwave the mixture for about another minute and stir everything again. Pour the mixture on top of the noodles. The mixture needs to cover the noodles or else they won't cook all the way.

Microwave on high for 5 minutes then stir the noodles and sauce and microwave again for 5 more minutes. If after 10 minutes, the noodles are still too firm, let them sit for about 3 minutes and check again. If still too firm then cook for a minute and check again. But a caveat! Do NOT put them in for another 5 minutes, once noodles start to cook they can overcook really easily.

Top with some grated extra cheese. Omnom!

Taste Test: The mother was then given a blind taste test of the two mac and cheeses. Unfortunately before she even tasted them she knew which was which...so no actual verdict was reached. She critiqued both and offered no real controversy for this post...alas... However, my brother and I determined that both stove and microwave versions of macaroni and cheese work and that both are truly kick ass.

HAP
PY HOLIDAYS! (and congrats to all of you who finished exams finals!!! yayyy!)
Wednesday, December 16, 2009

My Intro to Chocolate Covered Pretzels

To accompany the chocolate mice for my assortment of winter sweets, I made chocolate covered pretzels. I've actually never really tried chocolate pretzels, but a lot of my friends LOVE them. So, here was my first true experience with chocolate covered pretzels.

Based on the name I assumed that you would need:
-Rod Pretzels
-Chocolate
-Butter

First, melt your chocolate. I use semi-sweet chips. Microwave the chips for 30 seconds on High, then stir them. Repeat two more times. Depending on how much chocolate you have, dip or spoon the chocolate on the pretzel, so that about an inch is left undipped. Take the spoon and skim off some of the chocolate on the pretzel. Place the pretzel on a buttered piece of foil or parchment paper. Repeat for as many pretzels as you'd like to make.

While the chocolate on the pretzels is still warm, add your toppings. This can be anything that might be good with chocolate: sprinkles, chopped nuts, other chocolates (I used white), coconut, toffee bits, a LIGHT dusting of cinnamon or equally light dusting of red chili powder (avoid Indian chili powder though, it will burn away any other flavors), etc. etc.
My friend has also suggested dipping the pretzels in white chocolate and then in Nerds. Have not tried this, sounds delicious, if anyone does this please let me know how it is.

So, having now tried chocolate dipped pretzels, I get the hype. These things are good. Omnom!

Sunday, December 13, 2009

Chocolate Mice and Finals

It is officially the season of finals, a slightly problematic fact since it is also the season of cookie and candy making. Luckily, Chocolate Mice are able to balance the artistic needs of us college candy makers in a time of studying.

Years ago, my teacher was given chocolate mice as a present, and I thought, and still do think, that they are some of the cutest and simplest candies possible. The best part about chocolate mice is that they can be made in different steps, leaving time for finals prepping while different parts harden and cool.

To make chocolate mice you will need:
  • a 16 oz jar of Maraschino cherries with stems. 16 oz jars hold 40ish cherries and some always have their stems removed. Sadly, to be stemless means that the cherry is useless for this project and must be eaten directly.
  • a 8.5 oz bag of Hershey's Kisses. this holds just a few more Kisses than there are cherries
  • about 6 oz of semi-sweet chocolate
  • slivered almonds
  • butter to prevent sticking
First, take out the Maraschino cherries and pat them dry on a cloth or paper towel. You want them to retain some liquid but not be dripping. If they are covered in liquid when dipped in chocolate, then the chocolate will slide right off thanks to hydrophobic/hydrophilic molecular interactions (aka chocolate does not stick to water).

Next, microwave the chocolate in your microwavable bowl on high for 30 seconds; take it out and stir. Repeat this step two more times, until the chocolate if smooth, liquid, and glistens. Dip the cherries in one at time, making sure that the fruit but not the stem is completely covered with chocolate. Set the dipped cherry on a buttered plate of tray with the stem at about a 45 deg. angle from the tray. These will be the mice's bodies and tails.

While those cool, you can either go study or make the heads. To make heads unwrap the Hershey Kisses. Then pour out some of your sliced almonds and look for pairs of longer, unbroken pieces. These are your ears. Attach the ears by applying a little bit of melted chocolate (remelt chocolate if needed) to the bottom of each ear and lightly pressing it to the back of the Kiss. Mouse heads! wow, that actually sounds awful...

To attach the heads to the bodies, apply a dab of melted chocolate to the back of each head and lightly press it to the side of the body opposite the tail. Let the chocolate harden and you have your very own chocolate mice! I hate to say it (they're so cute), but omnom!

P.S. if you have a bunch of left over almond slivers, fear not, I am working to find a way of making almond cookies.

GOOD LUCK ON FINALS!

Sunday, November 29, 2009

Philly Foods: Chinese Custard

It seems that in a lot of cultures egg custard appears as some kind of dessert; there's creme brulee, flan, crema Catalana, Vietnamese steamed custard, and of course the egg tart.

These often personal-sized Chinese desserts have a crumbly, flaky, crust with barely a high enough ratio of flour to crisco to stay together. This shell houses a sweet egg custard that can have a thick heavy consistency similar to French custard or a more jell-o like consistency.

The tarts are cooked until they just begin to caramelize, browning on the edges of the shell and custard. When you bite into the tart you get a taste of every flavor it has from less cooked to more, from buttery crust to the bright custard flavor of egg yolks. That sunny flavor is really important to have in the egg tart. Don't settle buying tarts without that taste, because they are really easy to make (if you have an oven, but I'm working on other methods). The only recipe I can vouch for is from the cookbook Every Grain of Rice by Ellen Leong Blonder and Annabel Low, but I'm sure that there are many more out there.

I got the egg tarts in the picture from KC Pastries Inc. in Chinatown. They were 75c each. At about 2 inches across that's not too bad. These were definitely not the best egg tarts I've ever had, but they were still perfectly addicting (ones that were coming home for Thanksgiving may have never made it that far...)

Besides egg tarts KC, as well as many other bakeries, have some variety of a custard stuffed bun. Remember char siu bao? Well, these are the same idea except filled with custard instead of pork. KC's version of this was pretty weird; the custard's taste reminded of eggnog and was lighter than I'm used, too. If you dig eggnog, though, you have a winner. For a really good custard bun (really good being thick, yellow, eggy custard) go back to Mong Kok Station Bakery where the winning char siu bao were.

Omnom!
  • KC Pastries: 109 N. 10th St. in Chinatown. Great cakes, too!
  • Mong Kok Station Bakery: 153 N. 10th St. in Chinatown. Has incredible buns of almost any variety. You want to get there decently early because they do sell out of a lot of stuff. Do NOT buy cakes from Mong Kok. Stick to buns and what is in the glass cases perpendicular to the street only. There is one kind of hidden which faces the street. Nothing sells from there and stuff gets old and spoiled.

Tuesday, November 17, 2009

The College Microwave Basics: Potatoes

Before anything else I just want to give some serious love to William and Mary for somehow having this huge number of the Tribe become facebook fans all at the same time. You guys basically made my week (sorry UVA).

On to business, though. To continue the College Microwave Basics, this week: potatoes. I have always heard that you could cook potatoes in the microwave but it wasn't until my friend showed me Real Simple's 14 Surprising Uses for Your Microwave that I actually saw the details:
While the microwave won't give you a baked potato with a crisp skin, it will cook the average russet in about 4 minutes. You can simultaneously cook as many as will fit. (The general rule for heating more food is to check for doneness every 30 seconds beyond the regular cooking time.) Prick the potatoes all over with a fork and cook for 2 minutes. Turn them over and cook for 2 to 3 minutes longer.

Quick note: before you cook the potato wash it, so that you can eat the skin

Classics
: Add the butter, add some chopped chives, or sour cream.

Something new and fun: Potatoes work really well as a foil for almost any other flavor mixture. The potato I made has chopped up roasted red peppers, cream cheese, and minced garlic. Quick note on red peppers: incredible things, one of my favorite foods of all time. The one downside is that to get them at a decent price, you have to buy them in fairly large quantity. Therefore, more on these peppers will follow in posts after this as I try to eat through the whole can.

Another thing to try is this, one of my favorite things when I was little was this:
-Cut the potato in half and scoop out the inside of each half
-Mix in some cream cheese, curry powder, and thawed frozen spinach
-Put everything back into the potato skins and grate some cheddar or other semisoft cheese on top
-Microwave for 30-45 seconds or until the cheese is melted
-eat =)
Add basil or parsley with Parmesan cheese and olive oil or try bay seasoning and salt.

So enjoy! Omnom

Sunday, November 8, 2009

The College Microwave Basics: Oatmeal

Oatmeal gets a lot of hate. Why? It is delicious, shouldn't that be the path to love instead of hate? Not only is it wonderful to eat, but apparently decently healthy, as well (until you add chocolate, but that comes later). Also, like ramen, oatmeal is a great base for a bunch of different flavors.

So, here are the basics: For one person pour about a cup of oatmeal in a microwavable bowl. Add enough water so that some of the oatmeal on top floats. Then, and this is the trick, add some salt. Put it in the microwave for about 1 min -1.5 min on High. Make sure that the level of oatmeal/water isn't too high in relation to the top of the bowl or else it might explode over the top, which = a lot of microwave cleaning. After you've microwaved it, take the oatmeal out and stir it to see the general cook...edness of it and to see if you want more water/salt. I'm one of the people who loves stick-to-your-ribs oatmeal, so less water is better for me. Tada! Oatmeal (even less complicated than ramen.)

What to do now that you have oatmeal?

The Classics: Pour milk or cream on top with or without brown sugar and raisins. If you do use raisins though, try mixing them in before your cook the oatmeal so that they become less chewy and texturally out of place. Add cinnomon.

The Fruits: You can add most any fruit to your oatmeal. Try fresh berries if you have them or even add dried fruits and treat them as raisins. Bananas, pears, apples, peaches, or plums all work really well. Fruits with higher water levels such as watermelon or grapes might not work quite as well, but if you want you can try it.

With the bananas, pears, etc. you can also caramelize them with your iron. Slice your fruit and spread some sugar on it. Put them evenly spaced on a buttered or oiled piece of foil big enough that you can fold it in half and roll up the edges. Iron the foil packet on the Cotton (usually highest) setting, flipping the packet over about every thirty seconds. After you start to smell the apples, cook each side about three more times and then check to make sure that they are browning. If they are not, repeat this process until they are pretty soft and nicely browned. IMPORTANT NOTE: because this deals with oil, make sure that the packet is tightly sealed while you cook it, otherwise oil will leak everywhere. Also, when your iron has cooled make sure that you unplug and clean it!

Throw the fruit on your oatmeal and enjoy.

The Less Healthy: Chocolate. Pretty self-explanatory, chocolate makes everything better. This one is kind of weird, but if you have any egg custard or pumpkin pie filling those are amazing with oatmeal. A little molasses also never hurt anyone.

Get Creative: If you do have the iron, try making cookie bars.
  • About 1-1.5 cups oatmeal
  • Chocolate chips, amount is a personal preference
  • About a tablespoon of sugar
  • 1 egg
  • butter, room temperature, enough to decently mix in with the oatmeal
Put everything together and mix it well. Take the mixture and put it in a foil packet similar to the one for the fruits. Try this time, though, to make the whole thing very rectangular. This time however, try ironing the packet at a lower level than cotton, so that the egg can get cooked the whole way through. Flip the packet over every 1-2 min, but ALWAYS be in the room and keeping an eye on it! After about 5 flips, peel open the packet to see how brown the cookies are if very brown, unpeel it entirely and put it on a plate. Put that in the microwave for about 20 seconds just to cook any remaining raw egg. Cut into bars and tada! These were a bit chewy, but pretty good.

Feel free to post how you eat oatmeal in the comments! Omnom!

Sunday, November 1, 2009

The College Microwave Basics: Ramen

There is nothing more classic in the college dorm world than Ramen. It makes sense, though. Ramen is one of the simplest, most wonderful foods ever created. Those of you who think ramen is just this cheap food that only a starving college student would consume, you are horribly wrong. Ramen, though normally just noodles and seasoning, can be a really dynamic dish.

So here are the basics:

Microwave about 3 cups water until boiling (about 3 minutes). Add the block of noddles, seasoning, and any dried vegetable packets. Cover the mixture for 3 minutes. Uncover and eat. Yea... basically it.


The cool parts of ramen is that you can add practially anything to ramen and it becomes this fantastic meal. Below are some quick suggestions for what to add to your ramen for that dish one step beyond noodles in broth.

Seasonings: Add soy sauce, sesame oil, Siracha HOT chili sauce, or chili oil. Also, you can try substituting the cooking water with beef, chicken, or vegetable broth.

Extras: If you feel experienced enough with your water temperature you can try cooking while stirring an egg. To do this, cook your water a little bit longer to make sure it's really hot. As soon as you take it out of the microwave crack an egg into it and stir quickly. This should make the broth an egg-drop soup-esque consistency. This takes practice though.

Add crumbled up dried nori or other seaweeds.

Add cut up tofu. Open the tofu container, drain water, and cut up into small pieces. Dump those into the ramen.

Add cut up vegetables. Have carrots? celery? or green or white onions? Cut them up and put them in your ramen!

My personal favorite though, is adding the left over Chinese take out food. My ramen shown here has leftover Eggplant in Garlic Sauce and Sweet and Sour Vegetables. YUMMMM!

Well, that's College Microwave Basics: Ramen. Omnom!

Saturday, October 31, 2009

Midterm Mitigation (the genius behind 2 Stews Cheesecake)

Whoever it was that said "Midterms seem like a brilliant idea," clearly never had to study for them. This past month, I sold my soul to the library and dining halls and studied. Really, really hard. Now, for a few weeks at least, midterms are at bay and I can finally turn back to eating happier things than pizza.

This, of course, means cheesecake. 2 Stews, thank you, for coming up with a recipe so simple and brilliant: Cheesecake in the microwave. Seriously, this is one of those so-obvious-creations that it would take a genius to come up with it.

The premise is this:

"2 ounces low fat cream cheese, softened to room temperature
1/2 cup low fat sour cream
1/4 teaspoon vanilla
2 tablespoons sugar
2 tablespoons egg white,
slightly beaten (egg whites in a carton work fine)

1/2 teaspoon lemon juice
1/2 teaspoon cornstarch (prevents liquid from forming)

For "mix ins", add 1 tablespoon mini chocolate chips, or swirl in (not stir) 1 tablespoon jam of choice.

In a 1 cup or larger microwave proof mug, beat the cream cheese until light and fluffy with a small whisk. Mix in the sour cream, sugar, egg, lemon juice and cornstarch. Whisk about 2 minutes until light. Alternatively, the mixture may be mixed in a small bowl with a hand held electric mixer and then poured into the mug. Add any "mix-ins."

Microwave on medium for 2 1/2 minutes* (in a 650 watt microwave). Since microwave powers
are different, you may need to experiment. You want the center to just start to bubble, and then stop cooking. If it is allowed to bubble and cook further, the mixture will "break" and you'll need to start over. Make a note of the successful cooking time for your microwave. Take out of the microwave and let cool to room temperature and then refrigerate until fully chilled, about 1 1/2-2 hours. If any liquid has formed, carefully pour out. Sprinkle with graham cracker mixture and top with any topping of your choice.

*I also had success with 1 minute 50 seconds on high.
" ~ 2 Stews

Ingenious, right? I changed a few things in my creation. I used a whole egg instead of egg whites, because the things in the carton are EXPENSIVE. I did the cooking for 2.5 minutes. Because I am one of the people who has to have fruit with all desserts, after I chilled my cheesecake, I made strawberry topping! To make this take fresh strawberries (about 5), slice them, dump about a tablespoon of sugar on them, mix, and let sit until the strawberry release their juices into a syrup. Pour this on top of your cheesecake for a true New York experience. I also have never dug the whole graham cracker crust, so I tried using the graham crackers as... well, crackers and spooned some cheesecake strawberry mix on top.

A word of caution, even in the microwave, cheesecake is really rich, be careful on overusing this recipe in a short period of time. Yes, I speak from experience.

So, thank you 2 Stews for bringing this dessert into existence. There has never been a more perfect Midterm Mitigation. OmNom =)

Side Note: It's been brought to my attention that a lot of the basics of College Microwave cooking are unknown, so we'll be doing a quick series of entries on that this week. Let me know if there is anything in particular you've been wondering about.

HAPPY HALLOWEEN!

Saturday, October 3, 2009

French Onion Soup (part 1 of I Don't Feel Like Eating)

Flu recovery is not as speedy or as inclined towards foods as I had anticipated. Therefore, I figured blog and life could compromise on items which are more appealing to those who aren't feeling too hot. Granted, this recipe is a long way from where I was a week ago (which was drinking water and powerade), so if you are indeed feeling meh this might not be a great place to start. However, my doctor said go for comfort foods and, for me at least, French Onion Soup has always been a comfort.

For this recipe I looked up Julia Child's version, because I figured if "French" was in the food's name she'd know something about it.
I tried to stick as closely to her recipe as possible, but had to deviate from ingredients such as white wine. Telling the store clerk that "really, I just want it to make French Onion Soup in my microwave" didn't seem like the most promising endeavor. If you have the ability to use white wine though, please do because it adds a really good flavor which my virgin soup was lacking. However, I do not know how to boil off alcohol in the microwave and to just add the wine to this could have unfavorable results whether in complications with the microwave or with the alcohol not actually boiling off. The other thing I didn't have was sugar. The onions are supposed to be cooked with the tiniest bit of sugar, but that tiny bit really changes the onions' flavor.

Alright, let's get started. This recipe make about a pint of soup.
You will need:
  • 1 small yellow onion
  • 1-2 cloves of garlic, minced
  • 1 pat of butter
  • 1 tablespoon of olive oil
  • 2-3 pieces of bread
  • a little extra olive oil
  • tiniest bit of sugar maybe 1/8 teaspoon kind of size
  • a cup and half of beef stock
  • 2-4 slices of Swiss cheese
  • parsley, coarsely chopped (or dried flakes0 if you have it
First, cut the onion coarsely into roughly 1/2 inch squares and separate the pieces from their stacks. Next, melt the pat of butter with the olive oil (about 10 sec in the microwave) and mix it together in a bowl with the onions, garlic, and sugar. Now you can do one of two things. If you have an iron take the onions and dump them onto a foil sheet big enough that you can fold it in half and roll up the edges, but still have the onion pieces spread out and not built up upon each other. Iron the foil packet on the Cotton (usually highest) setting, flipping the packet over about every thirty seconds. After you start to smell the onions cook each side about three more times and then check to make sure that they are translucent. If not, repeat this process until they are almost transparent and are pretty soft. IMPORTANT NOTE: because this deals with oil, make sure that the packet is tightly sealed while you cook it, otherwise oil will leak everywhere. Also, when your iron has cooled make sure that you unplug and clean it!

If you don't have an iron, you can microwave the onion mixture for 2-3 minutes on High, definitely not as good, but it works. Then, add the stock. Microwave this whole conglomerate for 3 minutes on High. While it's cooking, toast your bread pieces using the method described in Grilled Cheese! With an Iron! Put the bread slices on top of the soup, then, put the cheese slices and microwave again for about 15 seconds. Sprinkle the parsley on top and voila! your very own French Onion Soup!

Sorry I've been gone! Omnom!

Sunday, September 27, 2009

oof.

So, while this should be a post about either a soup or dessert (I hadn't decided), you may have noticed from the lack of pictures that it is in fact not. The reason being that I have indeed contracted the flu, and if you've ever had the flu, then you know that the last thing you really want to do is eat let alone cook. (However, drinking Powerade mixed with water has never been more of a party).
Therefore, I will work to get something up sometime this week, it's just not going to be getting up today. Stay healthy!
~Chris

Sunday, September 20, 2009

Boba in the microwave (aka the best day of my existence)

If you know me at all, you would know that it was only a matter of time before I would try to make Boba, or Bubble Tea, in the microwave. I have spent more money than I care to admit on $3.00 boba, so when I found a pack of tapioca pearls in Chinatown for $1.35, I couldn't resist.

The instructions on the back of the pack seemed straight forward: boil 10 cups of water for 1 cup of bubbles, cook for 5 minutes. It sounded basically like pasta.


Attempt One: I poured about a quarter cup of bubbles into my handy-dandy pint-size microwavable bowl(for serious, if you have a microwave, get a microwavable bowl) and filled the rest up with water. Then, I microwaved it on High for about 5 minutes. The bubbles were cooked! (you can tell that they are cooked when they have all risen to the top of the water when you open the microwave door) buuuut, they were definitely
al dente.

Attempt Two: I poured the same quarter cup of bubbles into my handy-dandy etc etc bowl, but this time I only filled it up about an inch and a half above the bubbles. The logic was that water has a crazy high heat capacity, increase the cooking rate per minute by lowering the water needing to be cooked. Then, I microwave it on High for 3 minutes. When I opened the door the water was boiling, but the bubbles were perfectly cooked.

Perfectly cooked bubbles are important. If they feel starchy at all, similar to the feel of a unripened banana, then they haven't been cooked enough. However, if you can bite straight through the bubbles, and their consistency reminds you a lot of jello, they've been overcooked. You are looking for something where the outside if soft and squishy, but when you bite them they have a gum
my-esque texture.

*quick cool fact (to help formatting): most tapioca pearls are made with potato or sweet potato starch. GASP*

Now that you have Boba, you can put it in a drink. One of my favorite mixes is milk and aloe vera drink. The taste is sweet, clean, and great with any bao you might come across. Seriously, though, you can put almost anything with boba: tea, juice, water (if you want), soda. Another thing which is really yummy is boba with sliced mango and coconut cream, either by themselves or over warm and salted sticky rice (which you can also make in microwave, more on that later). Anywho, enjoy! Omnom =)

Sunday, September 13, 2009

Sunday Bruschetta Brunchinner

After a week of dining hall food, the weekend offered a wonderful reprieve. This morning I bolted from my dorm, shopping list in hand. I needed: tomatoes, basil, olive oil, butter, salt and pepper, bread, and, love of all loves, garlic. I was so excited because today was making my very own brunch, a brunch of bruschetta (which turned into brunchinner pretty quickly)

I was able to get a lot of the ingredients at Reading Market. I guess because it's out of season, though, I couldn't find any basil. Eventually, I turned to my favorite place in the world, Chinatown, and was able to pick up a small bundle of Thai basil for a buck.

The other trial and tribulation came from looking and looking and looking for good tomatoes. I'm pretty convinced Philly has none. For this recipe I ended up using stewing tomatoes which have a decent amount of flavor. However, ideally, I would like to use and would encourag
e you to use if you can the tomatoes in the above picture. Yes, they are heirloom tomatoes, but no you should not ever spend an insane fortune on them, and just because they are heirloom does not mean they are heavenly. These were the tomatoes I used and photographed like crazy the first time I made bruschetta. If you want any heirloom thoughts, just e-mail me =P

Quick note, my camera was feeling less than cooperative, so the pictures for this post are limited, sorry! Alright, so let's get started.


You will need:
-Two medium sized tomatoes that have some smell (actually pick them up, put them to your nose, and inhale. It's fun, trust me)
-Two-three cloves of garlic
-Six large basil leaves
-Salt and pepper to taste
-Olive oil to what feels right
- about five slices of bread (preferably bread with a crackly crust)
-enough butter at room temperature to coat five slices of bread on both sides

Core and then cut up the tomatoes into about half-inch cubes. Throw the cubes and remaining juices into a bowl. Mince the garlic and add it to the bowl. cut the basil into ribbons and add. Finally, add the olive oil, salt, and pepper. Mix. Isn't that simple?
While that mix sits and equilibrates, cut and butter your five slices of bread.

Now, toast your bread using an iron. The directions for this can be found in the previous post Grilled Cheese! With an Iron!, just follow that minus the cheese. When it is golden-brown and releases from the foil with ease, your bread is done and you can cut it in half and top it with bruschetta. The one down-side is that I really like bruschetta thick and crunchy, but the weight of the iron often removes this characteristic; Unfortunate, but still worth it to have easy dorm-made bruschetta!

So, leave your door open and inhale as the bouquet of bruschetta fills your dorm.
This is serious omnomming!

OH! and don't forget, I still need your input for the Test of the Best: Ramen Edition. Share your favorite ramen, additions, or anything else you feel is important!

Friday, September 11, 2009

Announcements! Announcements! Anou-ouncements!

FIRST ANNOUNCEMENT: The MiniFridge and Microwave will be holding its first Test of the Best very soon. A Test of the Best takes an assortment of some kind of food and puts it to a taste test of a panel of testers (i.e. dormmates, friends, and random people I snag off the street...kinda).

The first Test of the Best test will be (drumroll): RAMEN. There is nothing more quintescential "college eats" as ramen. There are a lot of different kinds of ramen out there, some good and some dreadful. We will decide which has the best noodles, broth, overall best etc.

But! Are there any types of ramen you think should not be overlooked? Is there a specific characteristic whose best carrier must be decided? Clue us in so that we can make this the best Test of the Best possible.

SECOND ANNOUNCEMENT: Also, if you hadn't seen yet, Mini and Micro is now on Twitter at http://twitter.com/MiniAndMicro (really creative right?). So, now you can follow the important food activities and the not as important but still delicious everyday food activities of Mini and Micro! Yay!

LAST ANNOUNCEMENT: Philly College kids, head down to Chinatown for most of your shopping almost always. Cheaper food and often super fresh produce. Seriously save money and it's more fun =)

Monday, September 7, 2009

Funky Food: Dry Soda

Funky Food #2: Dry Soda

Should you try it? I would recommend this soda for crazy soda lovers or for people really into floral flavors.

Where can you find it?
Random vendors listed here and of course http://www.drysoda.com/

$3.50...for a soda...

To put that in perspective, I resent paying more than that for breakfast let alone one carbonated drink.
But, how could I resist the lure of a slender and clear bottle marked simply in a minty green as "cucumber soda."

In high school, I spent a lot of time exchanging soda bottles with a friend of mine in an effort to find the best and weirdest varieties. As far as weird goes, Dry Soda's flavors probably take the cake. I tried Cucumber and later Juniper Berry, but there was also Lavender, Vanilla Bean, Lemongrass, Kumquat, and Rhubarb.

The actual flavor of the soda is unexpected to say the least. I'm a fan of dark droughts of root beer, syrupy sassafras, or a spicy bottle of ginger beer, but Dry Soda is light in its flavor, very, very delicate, and, I mentioned before, floral, but almost to a perfume-y level. Cucumber, unfortunately, reminded me a lot of the cucumber smell in Bath & Body Works lotions. It was one of those flavors that almost works before striking a chord in you mouth that just does not sit well. What were good were the sugar levels. There was definitely sugar present, but it was not the over-powering sweetness found in most sodas.

Juniper Berry was a real treat once I got into it. The flavor is like violet with a hint of heavy earthiness in the background and then this rich purple flavor (to add some synethesia) like the purple of Concord grapes.

I wanted to try more of the flavors but on a limited budget and having already spent over $7.00 on two bottles of soda, I turned towards cheaper and far less funky things.

However, if you have the cash and are wondering what to do with it or if you are simply gaga for new and exciting foods try out Dry Soda. You can order it here.

If you do get a chance to try any of the other flavors or even the two I mention, please, let me know how they are!

P.S. It is so obvious college has started because almost everyone has disappeared from the internet. Come back, college students, we miss you! =P

Saturday, September 5, 2009

The Philly Cheesesteak Classic: Pat's? or Geno's?

Figure 1. Pat's: both with cheese whiz, one onions, one peppers
No Philly visit or, in my case, four year residence is complete without the ultimate comparison of Pat's and Geno's Cheesesteaks. So, without delay I went for the comparison of the two rival establishments (located right across the street from each other in the Italian Market) and waited in the HUGE lines which were spilling out across the streets. Pat's is the original cheesesteak place. They started as a food cart business in 1930 and soon became a big hit for their chopped meat sandwiches. Geno's started in 1966 and ... that's about it. Now, there is a pretty legendary rivalry between the two and between people who put their love with one or other. It's actually really silly, but most everything good in life is.

So, which is in fact the better cheesesteak?

First, you should know that both have the same bread, so the competition really does come down to the cheesesteak aspect. Pat's had a lot and huge pieces of meat [fig. 1]. The cheese whiz (which you MUST get to really appreciate the Philly cheesesteak) was fine, you can't really screw up cheese whiz, but not enough for all the meat in the sandwich. Unfortunately, Pat's meat was also really thick and kind of overcooked, so it was pretty chewy.

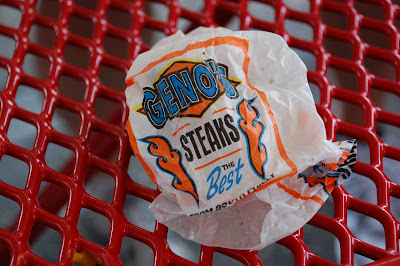
Geno's was really surprising [fig. 2]. They season their meat really nicely. I didn't even realize that Pat's didn't have seasoning until Geno's. Their meat also had thinner and better consistency than Pat's. They also had a decent amount of cheese =)


Figure 2.
Geno's: Both with onions, one cheese whiz, one American. Go whiz.

You've probably guessed which I would recommend, but I'll state it officially for the record. The MiniFridge and Microwave officially says that Geno's is truly "the Best."BUT, is Geno's the best cheesesteak in Philly? I happen to know it's not, but I'll keep you updated with new places as I get to them. For now, head down to the city of brotherly love and omnom.

Geno's
1219 S 9th St
Philadelphia, PA 19147-5005
+1 215-389-0659

Pat's
1237 E Passyunk Ave
Philadelphia, PA 19147-5060
(215) 468-1546

Wednesday, September 2, 2009

The Perfect Thing for the Microwave: Chocolate and Banana Bread Pudding (ftw)

First off, sorry that I didn't update again last week. A lot came up; college adjustment is a bit more complicated and crazily busy than anticipated. However, this recipe is pretty delicious, super simple, and perfect for nights just chilling in the dorm. Bread Pudding is one of those fantastic desserts (or breakfasts) which has a basic concoction (stale bread, milk, eggs) and then whatever in the world suits your fancy. All in all very straight forward. The only "issues" arise between those of us who like a drier bread pudding, more like a cake, or a wetter bread pudding, more like, well, a pudding. I stand by wet. If you are one who is horrified by the thought of un-arid bread pudding, then relax on the milk in this recipe.

For Chocolate and Banana (the best combo of flavors ever, by the way) Bread Pudding, you will need:

  • A circular microwavable container. Mine is about a pint in volume. To see what a microwavable container is see the previous post, Basic Microwavable Pasta.
  • 2-3 slices of decently dry bread. If the bread isn't dry, then it can't absorb all the things added which are delicious and good.
  • 2 eggs
  • 1 ripe banana. The one I got wasn't ripe; while the bread pudding was still wonderful, every bite of unripened banana had a hint of sadness =(
  • A handful of chocolate chips, maybe about 30. I have to take this moment to proudly state that I used just the right amount of chocolate chips. I'm saying this because some of my friends recently dined upon chocolate and banana pancakes, which I may have made "86% chocolate, 12% batter, and 2% banana."
  • 1/2 a teaspoon of vanilla extract
  • 3/4 teaspoon of cinnamon
  • 1 and 1/2 cups of milk, you know, roughly
First, mix together the milk, vanilla, cinnamon, and eggs in the microwavable bowl. You want the eggs mixed really well or else you will have chunks of cooked egg in your pudding. Cut up pieces of bread into strips or bit size pieces and then soak them in the milk, vanilla, etc mixture. Move the pieces around if you have to. Mix in slices of banana and the chocolate chips. Cook the whole group in the microwave on high for about 5 minutes or until there is no liquid that you can pour out.

While the bread pudding cooks, it may begin to expand. Mine started rising, and I freaked out, fearing another Panda Bread incident. However, it settles down again once you stop cooking it.

This recipe makes enough for probably two people, unless you really like bread pudding in which case omnom!

Wednesday, August 26, 2009

The Importance of Yogurt and the Deliciousness of Raita

College move-in is full throttle now. People are starting classes and for us poor freshmen it's exciting but kind of an upheaval. Which is why I am turning to yogurt.

The public is in full swing about why yogurt is important: because it works to enhance levels of good bacteria which can help your digestive system (especially good at stressful times such as college move in). But, it is lost on quite a few why healthy digestion is so important. Digestion is an important factor for seemingly unrelated things such as mood. I don't mean you have a stomach ache therefore you are unhappy. I mean that how well your digestion tract is working can determine the chemical balances in your brain. Other bacteria such as my favorite, Lactobacillus acidophilus (bionerds anyone?), can determine such remote things as stable estrogen levels.

Moral of the story: eat yogurt.

I will also quickly go beyond that and say if you can, eat plain yogurt. Not plain yogurt plain, necessarily, but plain yogurt usually has fewer fun and unneeded chemicals than flavored yogurts. Try eating yogurt with favorite jams or preserves. Honey is also a fantastic complement. Yogurt is great with granola or flavored syrups.

If you're more of a savory kind of person try this recipe for Raita, as it is called in Hindi, or Tzatziki, as it is called in Greek. There are small differentiations between the two such as type of yogurt used and in what proportion to the rest of the ingredients, but they both follow the same idea. The recipe I use here is one I wrote up during a class last year while paying attention to the lecture...

  • 1.5-3 cups of plain yogurt depending on how chunky or soupy you like your Raita
  • 1 firm cucumber
  • 1-2 large cloves of garlic (I did 2, but I love garlic)
  • 1/2 teaspoon of dried coriander or about 10-20 leaves cilantro
  • 3-4 large mint leaves
  • Salt
  • Optional additions: sprinkle some dill or some cinnamon
-Mix the yogurt until smooth.
-Slice cucumbers in half, seed, and slice thinly
-Place cucumber in a strainer and salt (i.e sprinkle salt on top of all of the slices so that it can remove excess water) for about 30-60 mins or until the cucumber slices are mostly dry
-Crush/mince the garlic and mix with yogurt, cucumber, coriander, mint, and if opted for dill and/or cinnamon.
-For really good melding of flavors, let sit overnight. This will also take the overwhelming bite out of your garlic.

Eat it with bread or chicken or salad. Actually, Raita can be eaten with almost anything, and it can almost anything absolutely delicious.

Omnom, everyone! And for those of you in college now hope it's awesome!

Friday, August 21, 2009

Panda Bread (kinda sorta)

Not every cooking adventure can be perfect. I accept this; I have had to, because bread in the microwave is not the easiest thing to figure out.

My friend asked if I could figure out a way to make Panda Bread, which she found at
Perfect Pandas, in the microwave. She says that "i want pandas in college." I figured, I've made cake, so why not try bread. It was not a failed recipe...but...it could use tweaking.

First step
was changing the ingredients from grams to measurements the average ones of us could understand. Thank you, WikiAnswers. I've listed the exact measurements I used, suggestions for previously mentioned tweaking in italics.
  • You will need a microwaveable circular container, if not circular some parts will cook more than others.
  • 1 egg yolk then fill up with milk to 7/8 a cup
  • 4 teaspoons melted butter, brought back to room temperature.
  • 1.5 teaspoons yeast
  • 2 cups flour
  • 1/2 cup cake flour
  • 2.5 tablespoons sugar I would add more sugar, maybe even double it.
  • 1 teaspoons salt
  • 3.25 teaspoons Matcha powder mixed in 2 teaspoons boiling water I would increase the amount of Matcha (and proportionally the water), because the flavor in my bread was like a tease; flirtatious but nothing happened.
  • 3.25 teaspoons cocoa powder mixed in 4 teaspoons boiling water I would increase the cocoa powder for the same reasons. Silly coquette flavors.
Beat the yolk with the milk, then microwave on high 30 seconds. Let cool to a warm temperature, closer to room temperature than anything. Add the yeast, mix it in and let it sit for a few minutes. Mix in the melted butter. Pour the mixture over the flours, sugar, and salt and knead together. Take out half of the dough and knead in the Matcha paste. Take out a quarter of the remaining dough and knead in the cocoa paste.

Now, here comes the tricky part: proofing. I didn't quite proof correctly, so when I baked my bread went from fitting perfectly to that fun image on the right. I would go by this recipe from allrecipes.com, where every 10 minutes you microwave on 50% intensity for a minute until the dough rises to about twice it's size.
Moral of the story? Proofing is important.

Alright, so your dough is all proofed, lovely and full of flavor. Now, you can arrange your different doughs. We'll just rely on the original images for that.

Baking is not so complicated. That same recipe says to bake for 10 minutes, but after about 4-6 minutes you want to keep a close eye on it because it can dry out quickly. Trust me.


All and all it's not bad, and really cute. Oh, also pretty good with milk. I'll take my drier pieces and make french toast tomorrow probably.

omnom!

Monday, August 17, 2009

What to eat with your friendly, neighborhood, Fontina cheese.

I've heard a lot about Fontina cheese, but never actually had it. To put it simply, this made me sad. So, while I was in San Francisco, I stopped by an Italian shop and got some.

Wiki said "Fontina has a mild, somewhat nutty flavor, while rich, herbaceous and fruity," so I decided to try making a sandwich with red grapes and, later while peering through the fridge, a red onion.

It was pretty darn good. It was/is also fantastically simple.
You will need:
  • 2 pieces of bread sliced
  • enough red grapes to cover a piece of bread while still leaving holes for cheese to melt through - sliced in half
  • red onion slices enough to probably twice cover the bread, because onions shrink in heat and lose their kick to sweetness
  • thinly sliced Fontina, amount depends on the strength of your cheese. The first Fontina I had was very mild, so I piled it on. The second Fontina I got was really strong, as in one of those cheeses whose smell is still on your fingers after several washings and hours later.
Pile everything on as shown in the picture and grill your Fontina grilled cheese according to previous post, Grilled Cheese! With an Iron!.

After working with Fontina, I've decided it's not a bad cheese and is great for grilled cheese especially since it melts really easily.

Omnom!